

How To Decorate A Cake For Beginners

How to make a cake step-by-stride. From baking, trimming, frosting and simple decorating
Gear up to make your showtime cake only don't know where to start? Today I'm going to show you how to decorate your very first cake and explain every step from tools, baking a basic vanilla block, trimming, frosting with sharp edges and of form decorating!

What You lot Need To Make Your First Cake Shopping List
Tools Recommended *note: this list contains affiliate links which practice not cost you anything simply I may make a few bucks off the auction*
- Three 6″ cake pans
- Bench Scraper
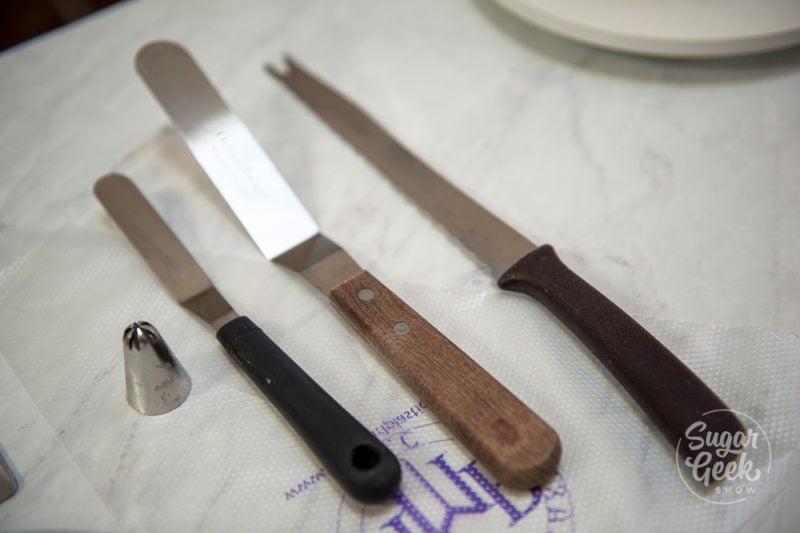
- Offset spatula
- 6″ cake lath
- Turntable
- Pipage bag
- Pipage tip
- Three half-dozen″ cakes – broiled and cooled
- Like shooting fish in a barrel Buttercream (one batch)
- Nutrient coloring
- Sprinkles
- Strawberry filling (optional)
I was inspired to make this mail because my daughter's teacher approached me i twenty-four hours asking if I had whatever tips on how to make a cake for the first time. It was her Mother'due south birthday and she had never baked or decorated a cake but had her middle on making one.
Of grade, I had tons of links to send her, recipes, videos and more than and I could tell she looked a little overwhelmed. It and then occurred to me at that moment that I had never made a video showing someone who had never fabricated a cake, how to make one from kickoff to finish.
Which is actually ironic because I myself non that long ago (2007) picked upwardly my kickoff box mix and can of lemon frosting to brand my first cake and I had no thought what I was doing. I remember having a lot of questions about the process but at the time, no ane to ask.
Why was the cake so soft and why is it slap-up?
Why won't this frosting stick to the side of the block?
Is information technology supposed to gustation similar this?
So hither is my consummate guide on how to make a cake for the very get-go time from start to terminate! Even if you've never fabricated a cake earlier, this volition articulate it all up for you. I recommend you lot read through this entire postal service first before yous start blistering so you can be sure to have all your tools and ingredients ready to go. I prefer to bake the day earlier I need the cake and then I accept fourth dimension to let the cake rest and arctic.
Block Decorating Timeline
It's really hard to bake a cake and decorate it all in one twenty-four hour period. This is my basic timeline for making a cake and giving myself plenty of time to become it finished. I always finish a cake the day earlier information technology's due so that if something goes incorrect, I accept fourth dimension to fix it. I've included some details in my timeline for extra things like making toppers or answering emails just in instance you're looking to starting time taking orders.
- Tuesday – Function work, await at the weeks orders to encounter if I demand to buy anything like tools or ingredients. Get over orders to encounter if I need to kickoff on any toppers or make-ahead pieces.
- Wednesday – Grocery shopping for supplies, start working on toppers or things that need to dry.
- Thursday – Bake cakes, make frosting and fondant. Cover cake board. Wrap and chill cakes overnight in the refrigerator or freeze cakes until common cold merely not frozen so I can crumb coat them (about an hour). I similar to take cakes crumb coated early then that I have more time to decorate, specially if I take multiple tiers to decorate on Friday.
- Friday – Utilize the final coat of buttercream and decorate. Store finished cakes in the fridge. I have a regular residential fridge with no freezer and adjustable shelves that I employ for my block orders. Fondant covered cakes can also exist stored in the fridge. They might sweat a little when they come out of the fridge but condensation does non injure the block.
- Saturday – Deliver cakes. Obviously, if your cake is due on some other day yous can adapt this timeline.
- Sunday/Monday – Block decorators weekend. Don't forget to give yourself time off or y'all'll burn out! Fifty-fifty fun things like decorating cakes can become really overwhelming and exhausting if you don't give yourself breaks. Specially if you have a family unit and a full-time task on elevation of decorating cakes.
Block Decorating Tools
Earlier you bust out the bowls and whisks, we need to talk virtually cake decorating tools. You don't demand everything on this list but if you get serious, it's a proficient list to follow. Below are the accented MUSTS to have earlier you lot decorate your kickoff cake and where to get them.

- Professional cake pan – The absolute #1 matter you lot need is a expert cake pan. In that location is nothing worse than wasting all that time and ingredients on a cake that is burned on the exterior, soft in the centre and the sides aren't straight. I bought my block pans at my local cake decorating store but you can also detect them at kitchen kaboodle or amazon. Psssst – Wilton pans are not professional pans. (sorry Wilton). Y'all'll need ii 8″ block pans for a two-layer cake or three six″ cake pans if yous want three layers. (if you only take i so your batter might get bad while the first ane is baking).
- Starting time spatula – Y'all don't need two sizes, you could get away with just the small one really simply I exercise use both sizes on every cake. The showtime spatula is a must and then that you don't actually go your fingers in the buttercream equally you're smoothing out your layers of buttercream. You lot can buy them at virtually grocery stores or cake supply stores.
- Serrated pocketknife – Aught fancy. A serrated pocketknife is also known as a bread knife. As long as it has those little teeth it will piece of work merely fine for cutting the tops off your cakes to make them overnice and flat. You probably already have this knife in your kitchen.
- Optional cake decorating tools (just really dainty to accept)
- Bench Scraper – This is my #ane baking tool. I utilize it all the time for getting my cakes perfectly smooth on the sides. I got mine at the dollar store but you tin can likewise find them at well-nigh grocery stores in the kitchen department or cake decorating shop.
- Turn Table – Y'all're definitely going to desire a turntable. It simply makes frosting the cake then then much easier. My starting time turntable was the piffling plastic one from Michaels and I used my twoscore% off coupon to buy it. You tin can as well employ a lazy susan if you have 1 with a apartment summit.
- Cake cardboard – These are also called block boards or cake cards. They are sparse boards that yous build your cake on and permit you to easily move your cake from the turntable to the cake platter. You can build your block straight on the plate only it'due south a little harder to get the sides perfectly smooth. If you're going for a rustic buttercream end though it'south not absolutely necessary. I get my block boards from amazon simply you can get them from Michaels or other stores that carry cake decorating supplies. Brand sure you go the kind that has a smooth border non scalloped.

- Piping Bag – I love me some disposable piping bags. If you don't accept whatsoever or can't find any, you can use a ziplock bag in a pinch with the tip cutting off. I get mine from Truly Mad Plastics but any pipage bag from the grocery store or cake store will be fine for this.
- Pipage Tip – Don't forget a pipage tip if you want to pipe some pretty rosettes on the top of the block! My favorite tip is a 2F simply whatever star tip will practise like a Wilton 1M.
- Sprinkles – Nothing says political party like sprinkles! Grab some pretty sprinkles to decorate the top of the cake. I got mine from Fancy Sprinkles but y'all can find sprinkles in the blistering aisle at most grocery stores or cake decorating stores.
- Gel Food Coloring – If you want to color some of your buttercream you're going to need some gel food colour (not liquid food color they sell in grocery stores). I got mine in the cake decorating aisle at Michaels. You don't demand a lot.


How To Make A Box Cake Taste Similar Scratch (WASC)
I'll let y'all in on a little secret, there are plenty of professional person cake decorators out at that place who don't bake from scratch, they use a box mix and add together ingredients to it to make it taste more like a scratch block. This is chosen a doctored box mix and is quite tasty!

The near popular doctored block mix is WASC which stands for White Almond Sour Cream Block. Simply you don't have to use a white box mix, you can make the same adjustments to a xanthous or funfetti box mix and information technology will sense of taste merely as good. If you desire to employ a chocolate box mix then check out the Chocolate WASC.
If you want to make your WASC into funfetti and so add in 1/iv cup of jimmy sprinkles (the long skinny kind) or confetti sprinkles. Mix into the batter at the very terminate of making the cake concoction.
How To Broil A Cake
Preheat your oven to 350ºF and place the oven rack in the center of the oven. If information technology's too low the bottom of your cake will burn. If information technology'southward as well high the top will get also crispy. Permit your oven preheat for at least thirty minutes to give the oven time to get hot enough.
Grease your pans. I prefer to employ a homemade cake release called block goop which is super simple to make. You tin can also use PAM or y'all can coat the within of your pan with a thin layer of vegetable shortening, grit information technology with some all-purpose flour and tap out the excess flour. Brand sure you go all the mode up the sides.

Identify all your ingredients into the bowl of a stand up mixer (or yous can do this by hand) and mix on medium for ii minutes. Separate your batter evenly between your cake pans.

Bake your cakes in the oven 30-40 minutes until a toothpick comes out of the centre of the cake cleanly. Information technology's ok to bake your cakes for longer if they are not done. Place the cake pans onto a cooling rack or on peak of your oven to absurd downward.
Once the block pans are absurd enough to handle (about xv minutes), you can turn them upside down onto the cooling rack and the cake should fall right out. Permit them cool for another 10-15 minutes until barely warm.

Wrapping And Chilling Your Cakes
One time your cakes are cool plenty to handle, wrap them in two layers of plastic wrap and place into the freezer to arctic for two hours (if you lot want to decorate your cake the same day as baking) or yous tin identify them into the refrigerator to arctic overnight. This is what I similar to practise and so that I am not rushed to decorate. Do non freeze your cakes solid if you lot plan on using them the same twenty-four hour period or it volition simply have a really long time to defrost them.
If you lot do freeze your cakes, place them on the counter withal wrapped until they are defrosted.
Chilling your cakes is super of import so that you lot can trim them and handle them without them breaking. The chilling causes the butter inside the cake to go nice and difficult but volition get soft once more when the cake comes to room temperature.
Making Piece of cake Buttercream Frosting
Now is a expert fourth dimension to make your buttercream. I know a lot of beginners think they want to use whipped foam because it is light and creamy only for making a cake, you will get nix merely headaches. I adopt to brand my easy buttercream frosting because you can but throw everything into the mixer, whip it upward until it'southward white and it'south done! Information technology's super low-cal and not too sweet.

The easy buttercream frosting is also slap-up for frosting the block and getting a smooth finish and is firm enough to piping with.
Shop your easy buttercream at room temperature with plastic wrap covering the elevation until you demand it. If you leave it out overnight brand certain you whip it a little scrap earlier you use it to make information technology shine once again.
Store leftover buttercream in the fridge or freeze it for up to 6 months in a ziplock bag.
Trimming Your Cakes
Time to trim our cakes! Now at the very to the lowest degree, yous should cut off the dome of your block. Identify your cake onto your turntable and unwrap the plastic wrap. Leave the plastic wrap under the cake for like shooting fish in a barrel make clean upwards of crumbs.
Use the line between the base of the dome and the side of the cake as a guide. Slowly start cut along the line about 1/ii″ and rotate your cake as you lot cut. Once yous accept cut all the way around the outside, start slowly cut the acme of the dome off, using the first cut as a guide. Keep your pocketknife dainty and flat and just go wearisome.
Optional: Trim The Chocolate-brown Edges Off Your Cake
This is definitely a bonus option but I always trim off the brown from my cakes because I retrieve information technology makes a prettier slice. Information technology's honestly pretty easy to do and also makes the cake very slightly smaller then yous have less of a chance of having brown show through your buttercream.

Turn your cake upside downwards so the bottom is at the elevation. Slide your pocketknife just nether the dark-brown "skin" and slowly cut it off in 1 piece. Go along your pocketknife nice and flat for best results. Exercise the aforementioned affair to the sides.
You tin see the difference.

If the brownish doesn't bother yous then you can definitely skip this step.
Stacking And Filling Your Cake
Time to get-go stacking our cake! Start by placing your cake board onto the turntable and center it. Place a small dollop of buttercream on the board and put your first block layer on the board. At that place should be a niggling space all the way around your cake between the cake and the lath.
Identify a big dollop of buttercream on top of the layer and utilize your first spatula to push the buttercream to the edges of the cake. And so hold the spatula at a 45º angle, with the tip in the middle of the buttercream and turn the cake slowly to flatten out the buttercream. Keep your spatula level so that the layer of buttercream is level.
I volition periodically get down to eye level with the buttercream to check and see if information technology'southward got a dome in the center or if information technology is dainty and flat. A flat cake is a stable cake.
Optional: Fill Your Cake With Strawberry Puree and Strawberry Buttercream
If you want to spice up your filling, you tin can easily add some flavoring to your buttercream similar a strawberry puree. You tin can fill your cake with straight strawberry but you demand a very thin layer or your cake layers will slip around too easily. You lot tin can apply my strawberry puree recipe only when you use fresh fruit, it always has to be refrigerated which can make the cake taste dry considering the butter in the cake is cold.

I like to use this shelf stable strawberry filling that a lot of bakeries use. You tin mix a trivial into your buttercream and brand it flavored or you can spread a little straight onto your cake layers.
Then I place a layer of the strawberry buttercream on pinnacle.

Add together your next layer of cake. If yous are using six″ layers then you will have 2 layers of filling, if you're using viii″ cake pans you lot'll only have one layer of filling. Either is ok!

Doesn't that look then yummy??
How To Crumbcoat Your Cake
You may or may not accept heard about a crumbcoat merely for the sake of learning, I'm going to explain information technology. I told you I wasn't going to skip anything!
A crumbcoat is a sparse layer of your buttercream all over the cake to seal in the crumbs. This is an important pace and then that you don't become any of those crumbs in your final layer of buttercream frosting.
Place a big dollop of buttercream on the superlative of your cake and utilize your modest offset spatula to spread the buttercream into a thin layer all over your cake. Y'all don't have to be nifty and tidy, just a thin coat will do. You tin see there are a lot of crumbs and chunks of strawberry in this layer of buttercream, that's totally ok.

Once your cake is fully covered, you can place it into the fridge or the freezer to house upwardly. In one case the buttercream is house to the touch yous can put on your final coat of buttercream without the crumbs getting into it.
How To Get Smooth Frosting On Your Block
Now we're going to apply the final glaze of buttercream to our cake. Use your larger start spatula to use some frosting to the tiptop of the cake and smooth information technology down apartment the same way nosotros smoothed out the layers of buttercream between the cakes. At present apply some frosting to the sides of the cakes. Make a nice thick glaze.

Now comes the fun part. Apply your bench scraper to slowly scrape abroad the excess frosting. Wipe the excess back into the bowl. Agree the scraper straight up and down with the base of operations confronting the turn table. One time you get to the lath, yous're done! If you have any low spots just add some more buttercream and continue scraping until the sides are nice and smoothen.
Use your small offset spatula to clean up the top edge by slowly dragging the buttercream from the exterior edge towards the center in a smooth motion.
How To Decorate A Block
Now you can decorate your block! This is really the easiest part now that we have congenital our cake and frosted information technology so well, you accept a nice clean canvas to start with!
For my cake, I placed some sprinkles into a big bowl and held my cake in my left hand. With my right hand I scooped upwards some sprinkles and pressed it to the sides of the block, letting the backlog fall back into the bowl. Don't worry, your block will be ok!

Next, let'south pipe some pretty rosettes for the pinnacle of the cake. I place my piping tip into my piping handbag and cut off the stop of the bag then the tip opening fits through the end. Don't cut too much off or the piping tip will fall out of the bag.
If you want to colour your buttercream, simply place a couple of big scoops into a bowl and add a couple of drops of your nutrient coloring. Mix with a spatula until there aren't any streaks left.
Adjacent, place the bag into a cup and fold the edges downwardly effectually the sides. This makes it easier to scoop some buttercream into the purse. You don't demand a lot.

To pipe even rosettes, I pipage the first rosette and so turn the block 90º so that the rosette is directly across from me. So I pipage my second. Then I turn my cake 45º and practise the same thing, basically piping direct between the first two rosettes and and then I do the same on the other side. Then I merely fill in the infinite between with two more rosettes. That way all my rosettes are the same size and spaced evenly.
The terminal matter I do is add together some more sprinkles to the superlative of the cake!
You accept officially decorated your first block! Become yous!! I knew you lot could do it.

If you lot had fun learning how to make a cake please exit a comment below and if you're a fellow member of our facebook group, I'd love to run into you mail your cakes!
One more than affair, I usually store my cakes in the fridge earlier I deliver so they stay nice and firm but if you're non traveling far and it's not too hot, then cakes taste better at room temperature.
Did You Make This Recipe? Leave a rating and tell me how it went!

First Cake Recipe (WASC)
A doctored cake mix that is well-used by bakers all over the world that produces a delicious white cake that tastes almost like scratch. This recipe makes three 6"x2" cake rounds or 2 8"x2" cake rounds
Impress Rate Never Miss A Cake
Serves: 24 servings
Calories: 612 kcal
Ingredients
WASC Cake
- 1 box white cake mix I like duncan hines
- 1 cup AP flour
- 1 cup granulated sugar
- i/4 tsp salt
- ane cup sour cream room temp
- 1/2 cup melted butter
- ane cup water
- iv egg whites fresh non boxed at room temperature
- 1 tsp almond extract
Easy Buttercream Frosting
- 1 cup pasteurized egg whites 8 oz
- 2 lbs powdered carbohydrate 32 oz
- 2 lbs unsalted butter 32 oz softened to room temperature
- 1/2 tsp salt
- 1 Tbsp vanilla extract
- 1/4 cup strawberry puree optional
Instructions
WASC Cake
-
Pre-heat your oven to 350ºF at to the lowest degree 30 minutes earlier baking to give your oven fourth dimension to heat up properly. Set your pans with cake goop or another preferred pan release.
-
The instructions for this cake are super like shooting fish in a barrel. Basically put information technology all into a basin and mix information technology on medium speed for 2 minutes! Voila! Cake batter is gear up.
-
Divide your batter into your block pans evenly. Bake the cakes at 350ºF for 30-35 minutes or until a toothpick inserted comes out clean. Information technology's ok to broil your cakes for longer if they are non done yet.
Like shooting fish in a barrel Buttercream Frosting
-
Mix the pastuerized egg whites and powdered saccharide together on medium speed until the sugar is dissolved. About ii minutes.
-
Add the softened butter in pieces while mixing on low with the whisk attachment until it's all added in. Then bump the speed up to high and whip until the buttercream is light and white and fluffy.
-
Taste the buttercream. If it still tastes buttery or looks curdled, proceed mixing. Y'all can't over-whip this buttercream.
-
Frost and decorate your cake as desired
Notes
Don't worry about any of the ingredients on the dorsum of the box, only utilise the ingredients listed in the recipe.
This recipe makes enough concoction for three half-dozen"x2" cakes or ii 8"x2" cakes (round).
This recipe makes 36 cupcakes with nigh 1.5 ounces of batter per cupcake can.
Yous can replace 4 egg whites with three whole eggs if desired
If your buttercream is curdled because your butter was too cold, accept out 1/ii cup of frosting and melt it in the microwave for nigh 15 seconds. Mix it dorsum into the frosting to bring the mixture back together and brand it creamy.
Tools & Materials List
Tools Recommended *note: this list contains chapter links which practice not cost you lot anything simply I may brand a few bucks off the sale*
- 3 half dozen" cake pans
- Bench Scraper
- Offset spatula
- half dozen" cake lath
- Turntable
- Piping bag
- Piping tip
Materials Needed
- Three 6" cakes - baked and cooled
- Like shooting fish in a barrel Buttercream (one batch)
- Food coloring
- Sprinkles
- Strawberry filling (optional)
Nutrition
Serving: 1 slice | Calories: 612 kcal (31%) | Carbohydrates: 68 k (23%) | Poly peptide: iv g (viii%) | Fat: 37 yard (57%) | Saturated Fat: 23 g (115%) | Cholesterol: 96 mg (32%) | Sodium: 296 mg (12%) | Potassium: 53 mg (2%) | Fiber: 1 g (iv%) | Carbohydrate: 55 g (61%) | Vitamin A: 1204 IU (24%) | Vitamin C: 2 mg (2%) | Calcium: 69 mg (vii%) | Fe: 1 mg (half-dozen%)

How To Decorate A Cake For Beginners,
Source: https://sugargeekshow.com/news/how-to-make-a-cake/
Posted by: gloriathriff.blogspot.com
0 Response to "How To Decorate A Cake For Beginners"
Post a Comment